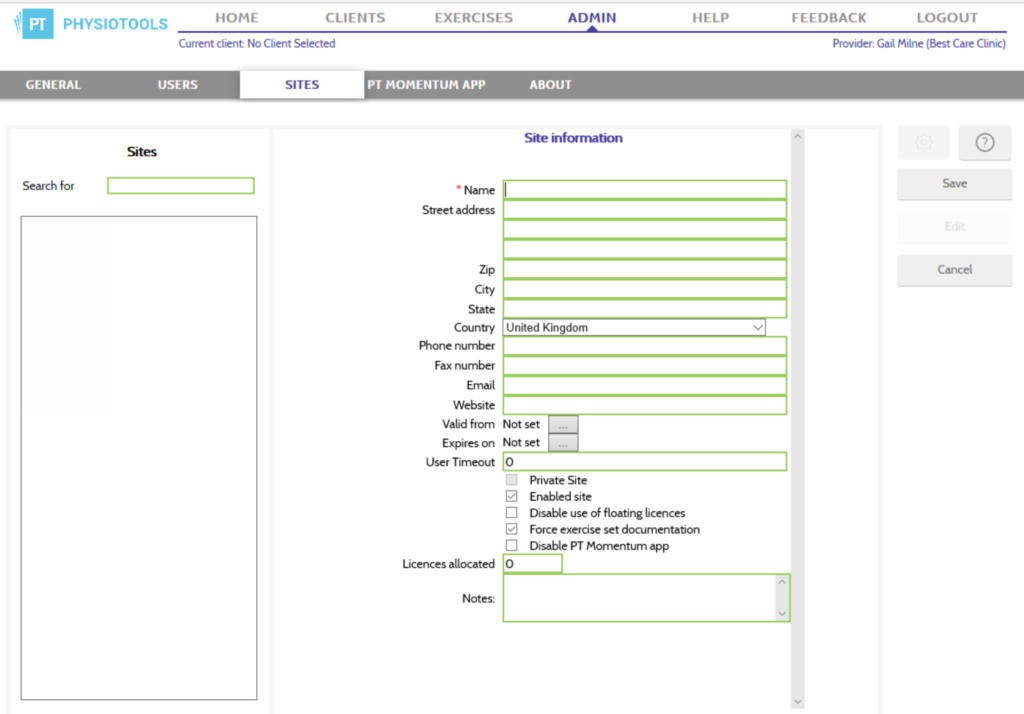
Quick guide to creating a new site
- Click Admin – Sites – New
- Complete all the required fields
- Click Save
Click Admin in the top menu bar, click Sites.
Click New and complete the following fields:
Name: Name of the organisation. For example: a department or hospital.
Street address
Zip (Post code)
City
State (County)
Country
Phone number
Fax number
Website
Valid from: If a time limit is needed for this site, select a date which the site is valid from.
Expires on: The date when the site should be deactivated and the users within this site can no longer access the program.
Private site: By default, Sites in Physiotools can share information. Although a private site can view exercises uploaded and templates created and shared to all sites by users, information created in a Private site cannot be viewed by other sites. Only a System administrator can define a Private site.
Enabled site: Checked by default. If you want to deactivate a site, uncheck the box. You can still search for inactive sites which will be shown in pale grey.
Disable use of floating licences: Checked by default.
Force exercise set documentation: When checked, users of this site will be prompted to save the exercise program after printing or emailing.
Disable Physiotools Trainer client app: Check to disable Physiotools Trainer on this site.
Licences allocated : This value shows how many licences are specifically allocated to this site. We suggest it remains at 0
Notes: Additional information about the site.
Save: Click Save to save the site information.
Edit: Details of an existing Site can be changed. Find the site by typing the name in the Search for field. Select the site from the list and click Edit to amend the details. Click Save when you have finished.
Cancel interrupts the editing process without saving any changes made to the client record.

