As a site administrator you can make changes to the following settings for the site you belong to:
- The header of the exercise program
- The appearance of the exercise program
- Add additional printing options
- Adjust selected text in the email template when sending exercise programs by email
These settings will apply to all users belonging to the site that you administer.
You can access the settings by clicking on Admin – General
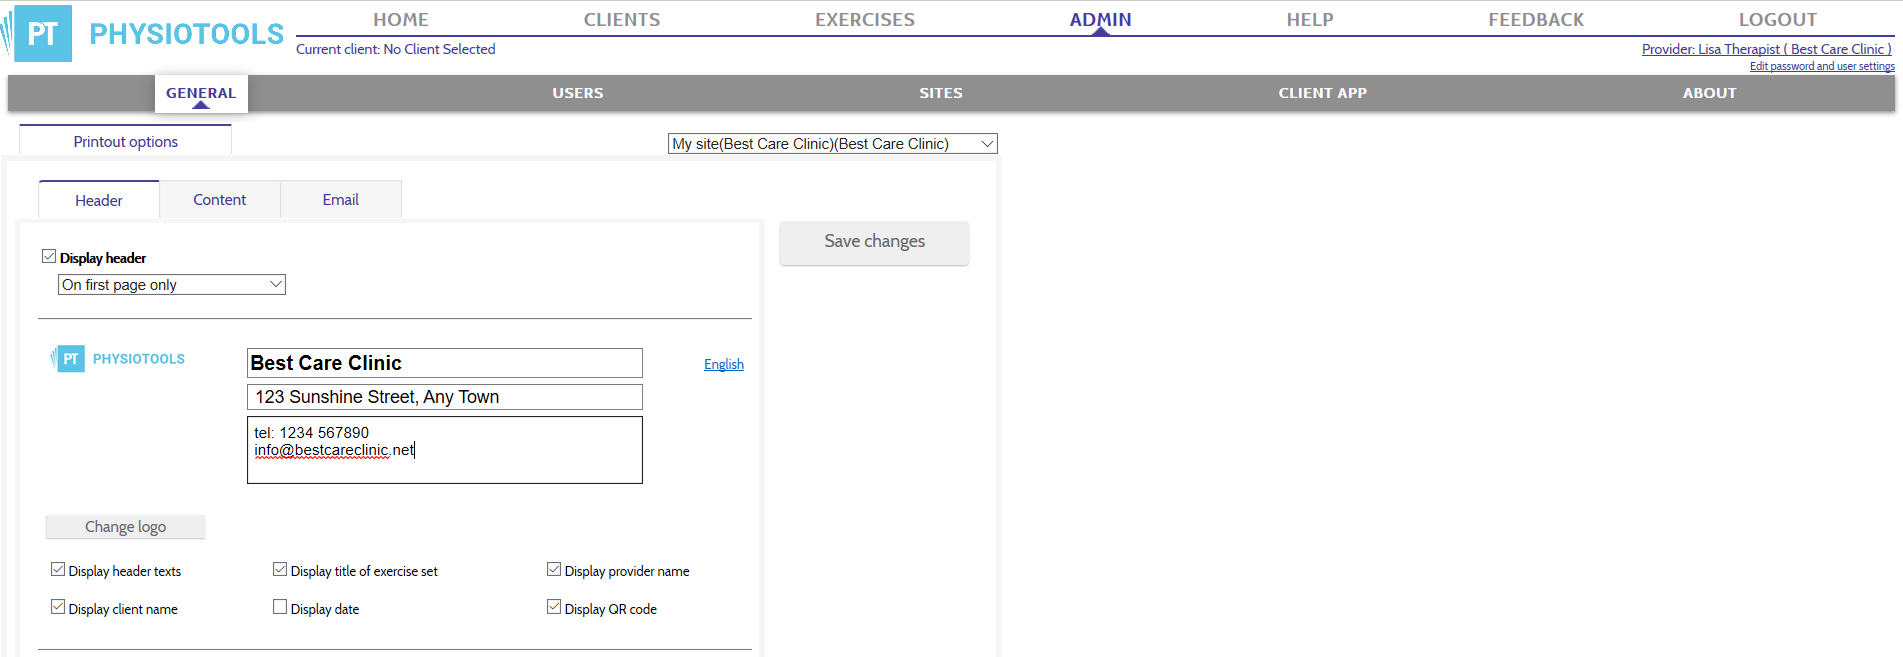
Header tab
Display Header: Use the drop down list to choose where the header should be displayed on the exercise sheet. Uncheck this box to remove the header.
Header text: Change/add the text that you want to appear at the top of your exercises program.
Change Logo: Click the Change logo button and the Change header logo window opens. Browse to find your logo file, select the file and click OK to upload it.
Check Boxes: There are six different boxes that are self-explanatory and these delete corresponding information in the header of the exercise program.
Content tab
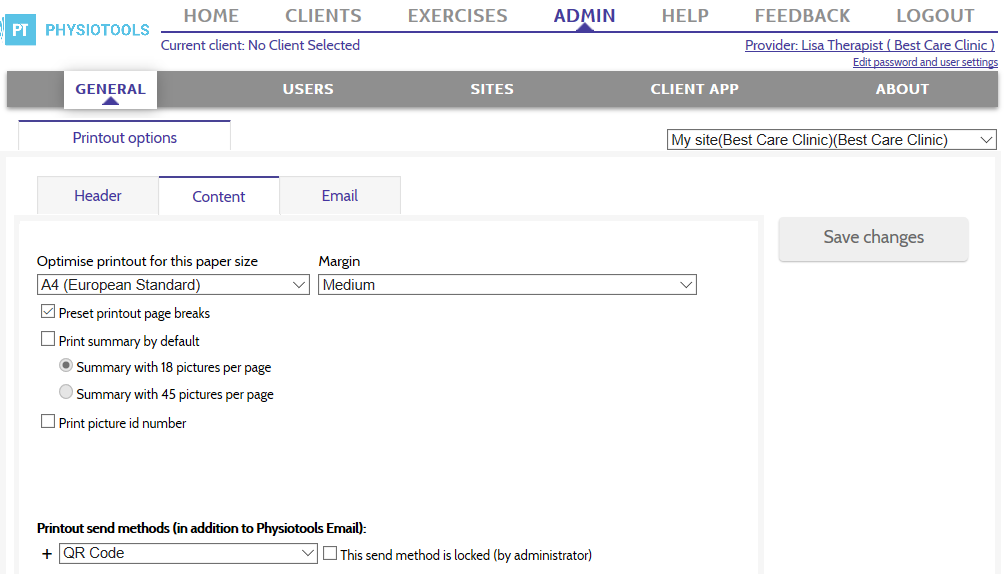
Optimise printout for this paper size: you can switch between A4 (European standard) and Letter (North American standard) when printing the exercise programs.
Margin: You can change the margin of the printout. If you are experiencing problems with too large or too small a margin, you can change this to a different value.
Preset printout page breaks: If it is selected, the system tries to keep the image and the associated instruction text on the same page as far as possible. However, if you have written a long instructional text yourself, it may still mean that the text runs over onto two pages.
Print summary by default : If you want to print a page with a short summary of the images that are included in a exercise program, this box should be checked.
Summary with 18 images or Summary with 45 images per page: The radio buttons determine how many images should be displayed per page in the summary.
Print picture id number: Each image (exercise) has a unique number this is searchable on the Exercises page. By printing this number along with the image, you can quickly find the exercise.
Printout send methods (in addition to Physiotools Email): You can add additional features to the Print Preview page for all users. These are added as buttons.
- PDF: save an exercise programs as a PDF
- My Own Email – directly opens the user’s own email program and sends a link via email that leads to the exercise program
- QR code – Adds a button that opens a QR code for the current program. QR codes are only generated and displayed when an exercise set is saved and / or printed for a client. Instead of the code, only a placeholder is shown in print preview. This ensures that only the intended recipient can see or scan the code
- Cloud Print: If you have this service via Google Cloud Print, you can activate the button in Physiotools.
- Clipboard: Saves the exercise set link to your clipboard.
This send method is locked (by administrator) : as a Site Administrator, you can lock any of the above transmission methods so that they cannot be changed by a user on the Print Preview page.
Email tab

Include PDF attachment : If this box is selected, a PDF file is automatically created for the exercise program and added to the email as an attachment.
Email template: English, you can change to other languages in the drop down list.
Text field: In the field at the bottom of the screen you will see the text included in the email itself (see image above). You can change this text if necessary.
How to deactivate the Physiotools Trainer client app
As a site administrator, you can disable the function to send exercise programs to the Physiotools Trainer client app from Physiotools.
Click Admin and then Client App.
Enable Physiotools Trainer client app is checked by default. To disable, click Edit and uncheck this box, then click Save to the right of the page.